The Slidecrew Local Server App allows you to run a local caching server directly from your device. This boosts performance and provides offline functionality by syncing presentation files between connected devices and the Slidecrew cloud.
Installing and Pairing the Slidecrew App Launcher
Before using the Server App, you’ll need to install the Slidecrew App Launcher and pair it with your event.
Note that the local server is only available for the Windows version of the App launcher.
To get started:
- Log in to your Slidecrew event portal.
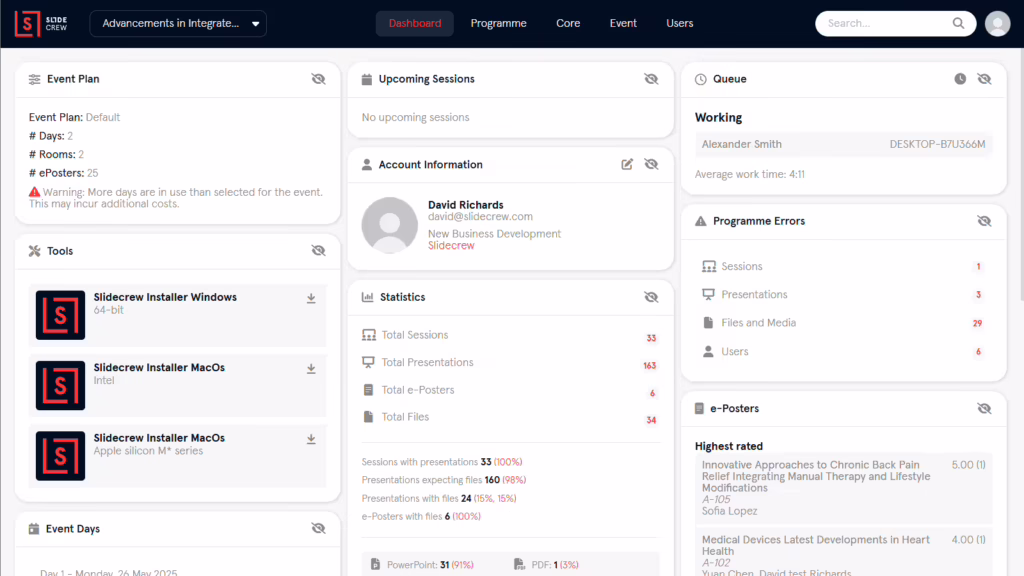
- Go to the Dashboard and locate the Tools section
- Download the installer for Windows:
- Run the installer and follow the on-screen prompts.
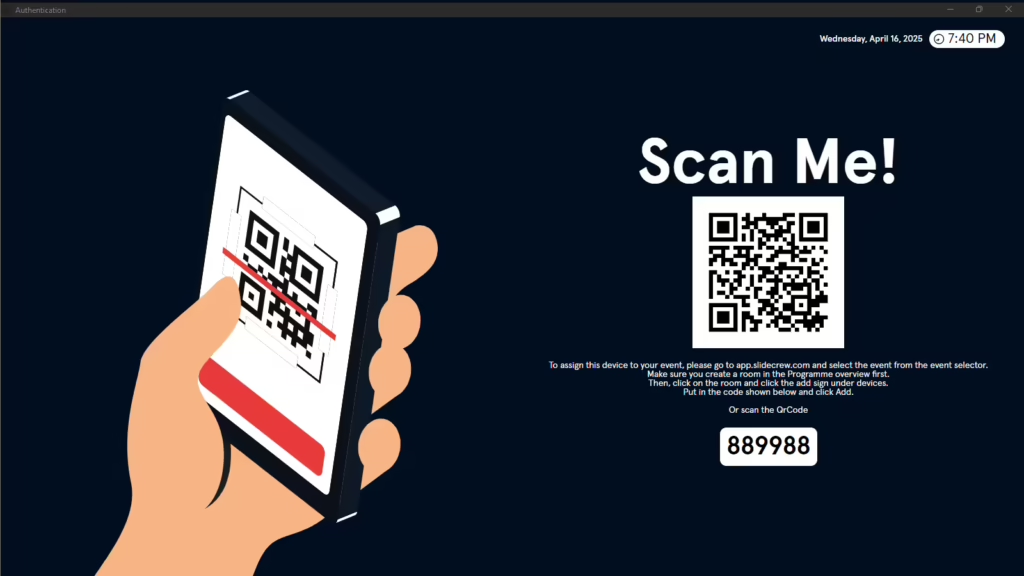
- After installation, open the App Launcher, which will show a 6-digit pairing code.
- In the event portal, open the Devices page under the Core menu.
- Click the red “+” button, enter the pairing code, and click “Add”
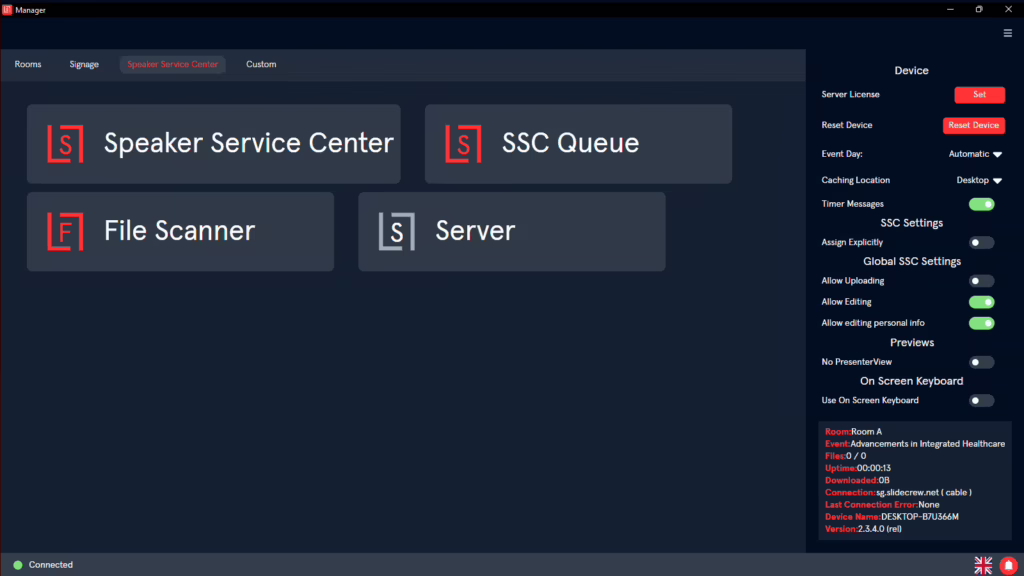
- After pairing, the App Launcher will switch to the Software Manager view.
Activating the Server App
By default, the Server App option will be greyed out until a valid license is added.
To activate it:
- In the Software Manager, click the menu button in the top-right corner.
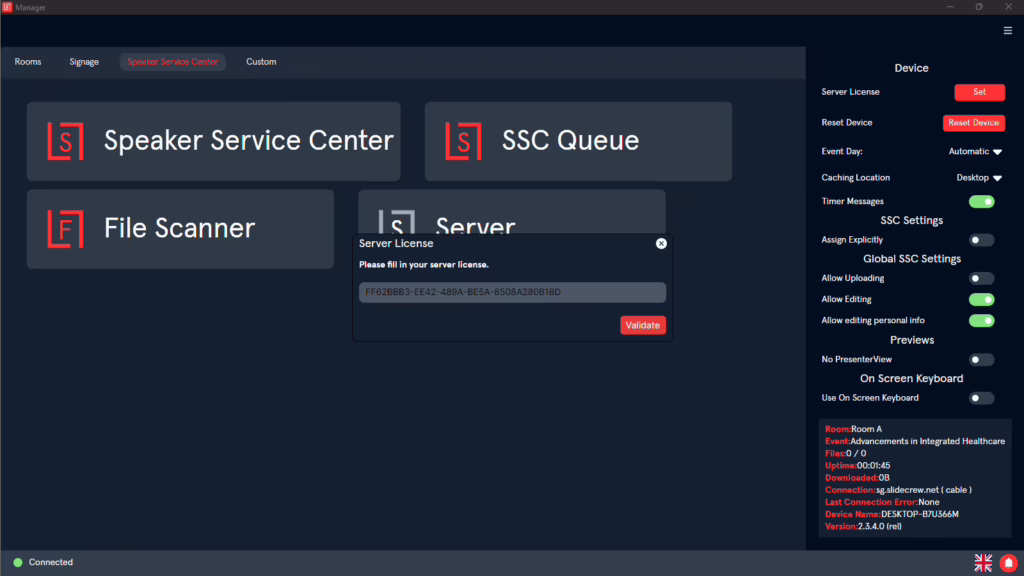
- Click “Set” next to Server License. A pop-up will appear to enter your server license key.
- Paste in the license key from the top of the Devices page in your portal.
- Click Validate.
- The Server App button will now be active. Click to launch the Server App.
Server App Overview
After launching, you’ll see four main tabs: Dashboard, Files, Devices, and Scanner. Each provides tools to monitor and manage your event’s local file activity.
Dashboard Tab
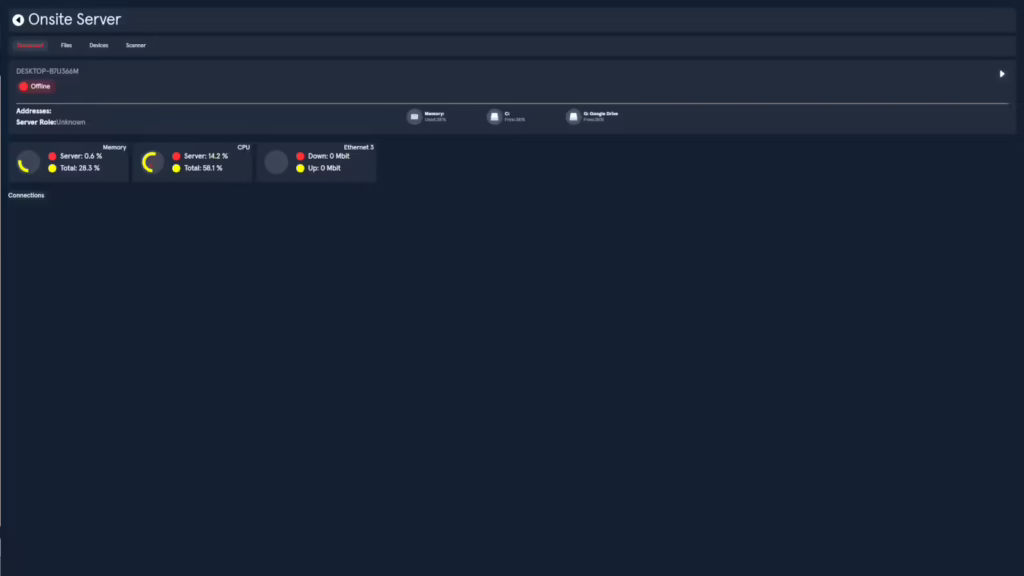
The Server app launches in Offline mode. Click the Play button (top-right) to start the server.
- The server will boot up and switch states: Offline → Booting → Online.
- The server will download and update additional packages needed.
While online, this tab displays:
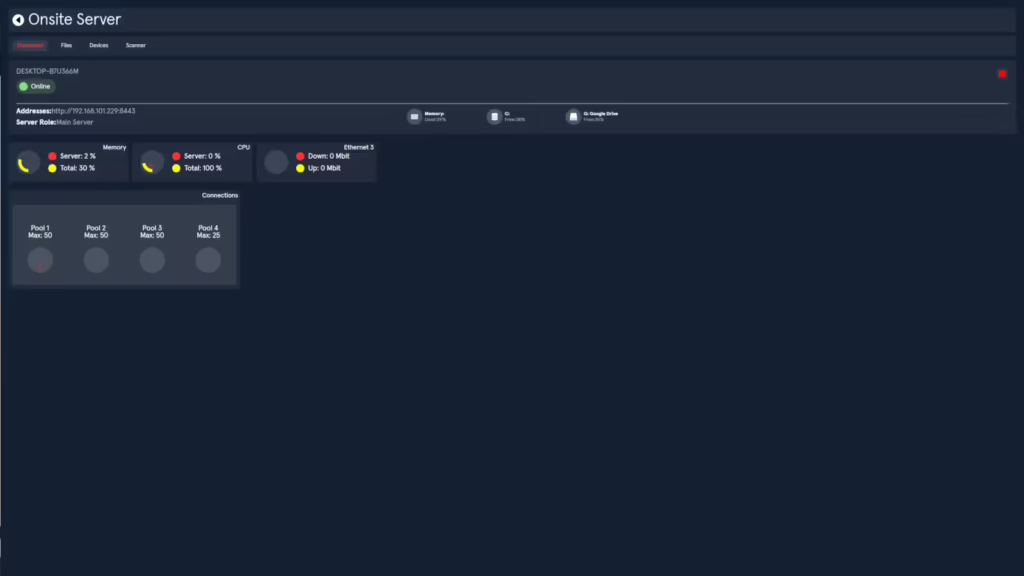
- System Performance (CPU, memory and network usage).
- Client Device Pools which determine how many device connections your hardware can support, based on the detected cores for the Server Device. For more information, please see the Hardware Requirements section of our Network and Hardware Recommendations page.
- Server Role (Main/Backup) and the IP Address for accessing the event portal via the local network.
If more than one server is active on the same network, the server that was started first is the Main. If the Main Server loses connection or is stopped, the next backup that was online the longest will become the Main.
To stop the server:
- Click the red Stop button (top right) to stay in the app.
- Or use the Back button (top left, next to “Onsite Server”) to stop and exit.
Files Tab
The Files Tab This tab provides a list of all presentation-related files that the local server has handled, including previews and thumbnails, whether uploaded from on-site devices, downloaded from the cloud, or synced between devices on the local network.
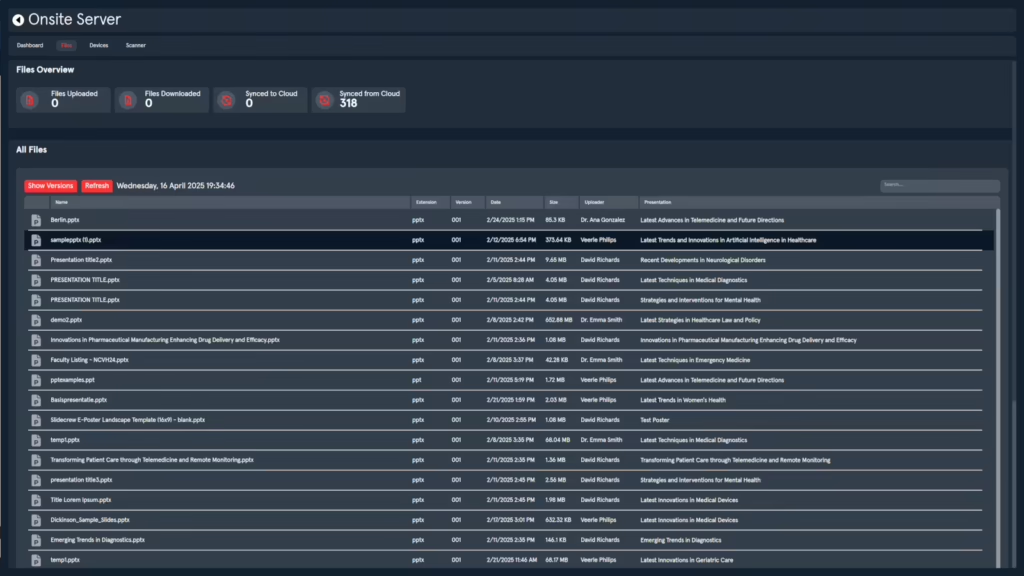
The overview section at the top of the page shows a count of each of the following categories:
- Uploaded (on-site) – files submitted directly from devices during the event.
- Downloaded (on-site) – files fetched from the server to local devices.
- Synced to cloud – files and previews successfully pushed to the Slidecrew cloud.
- Synced from cloud – files pulled down to the server from the cloud, including any thumbnails or analysis previews.
The list of files should refresh automatically, but there is also a “refresh” button, along with an indication of the date and time of the last refresh.
The list view of the files can be
- sorted in ascending or descending order by clicking on the titles of the various columns, like file extension type, version, Date uploaded, uploader name, and presentation title associated with the file.
- Searched by file name, uploader or presentation title by using the search bar at the top right. Please note searches are case sensitive.
To view and download the previous version of a file:
- select it from the list and click the “show versions” button next to refresh.
- This will show a pop-up listing all previous versions of the file, along with a download button for each.
Devices Tab
The Devices tab provides a live overview of all the devices connected to your Slidecrew event via the local caching server.
Each connected device is shown with key details for quick reference:
- Device Name – the internal name given during setup or pairing.
- Assigned Room – indicates which room the device is currently assigned to in the portal.
- Device IP Address – the local network IP used for communication with the server.
- Connection Status – displays whether the device is currently online or offline.
- Role/Purpose – shows which Slidecrew App(s) the device is running, such as Kiosk, Technician, Timer, Room Info Display, etc.
You can sort the list to help quickly find what you’re looking for by Device Name, Display Name, Assigned Room, or Purpose.
Scanner Tab
The Scanner tab allows you to enable and manage local file scanning on your server device. While file scanning is usually handled in the cloud, enabling this feature locally can be especially helpful for offline events, or where internet connectivity is limited.
When active, the local server will take over the role of scanning presentation files for potential issues such as large embedded media, unusual fonts, incorrect slide formats, and other common issues.
To Activate Local Scanning
- Click the Scan button in the top-right corner of the tab.
- This will download and launch the local file scanner tool directly on the server device.
- As long as the scanner is active, incoming presentation files will be processed and analyzed locally for potential issues.
Automatic Cloud Failover
- If the local scanner is turned off or the server loses internet connection, the Slidecrew system will wait 3 minutes and then automatically resume scanning in the cloud.
Running the Scan Tool on Additional Devices
You can also run the File Scanner App on other devices using the Slidecrew Software Manager.
This allows you to distribute the scanning load, speeding up the overall file analysis process during busy upload periods.
This setup is particularly useful at large events with several Speaker Service Centre stations or during peak check-in times when many files are submitted in a short span.