

Create a speaker form in Slidecrew to collect information or signatures from speakers and moderators, then choose who receives it and how you want to review the responses.
Short answer: Create the form under Event → Forms, choose whether it applies per speaker, presentation or moderator, then add content and question blocks in the Form Editor. You can filter the form’s audience, review each submission as a PDF or link, export form statistics to a spreadsheet, and copy forms to another event if you are an Admin or Organiser.
Create a form for speakers or moderators
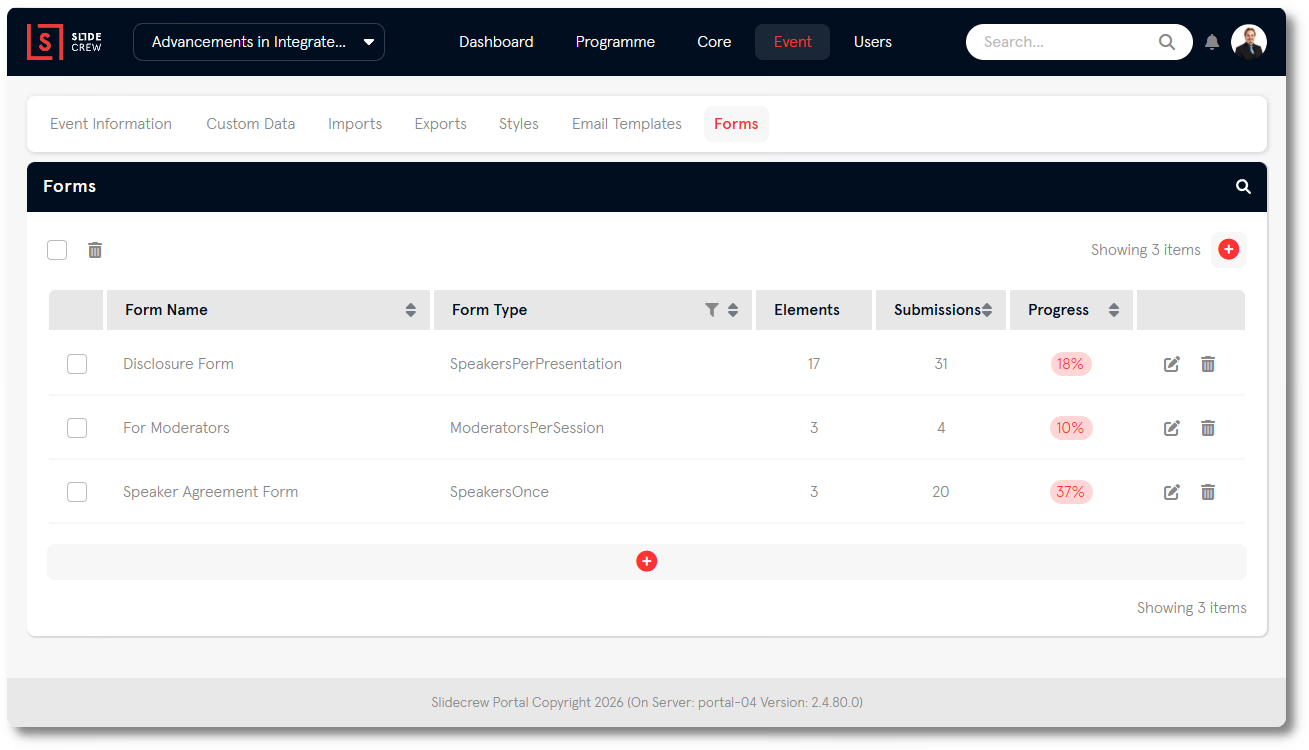
Create the form from the event’s Forms page, then give it a name and choose its type.
- Navigate to Event in the top menu, then select Forms.
- Click the add button.
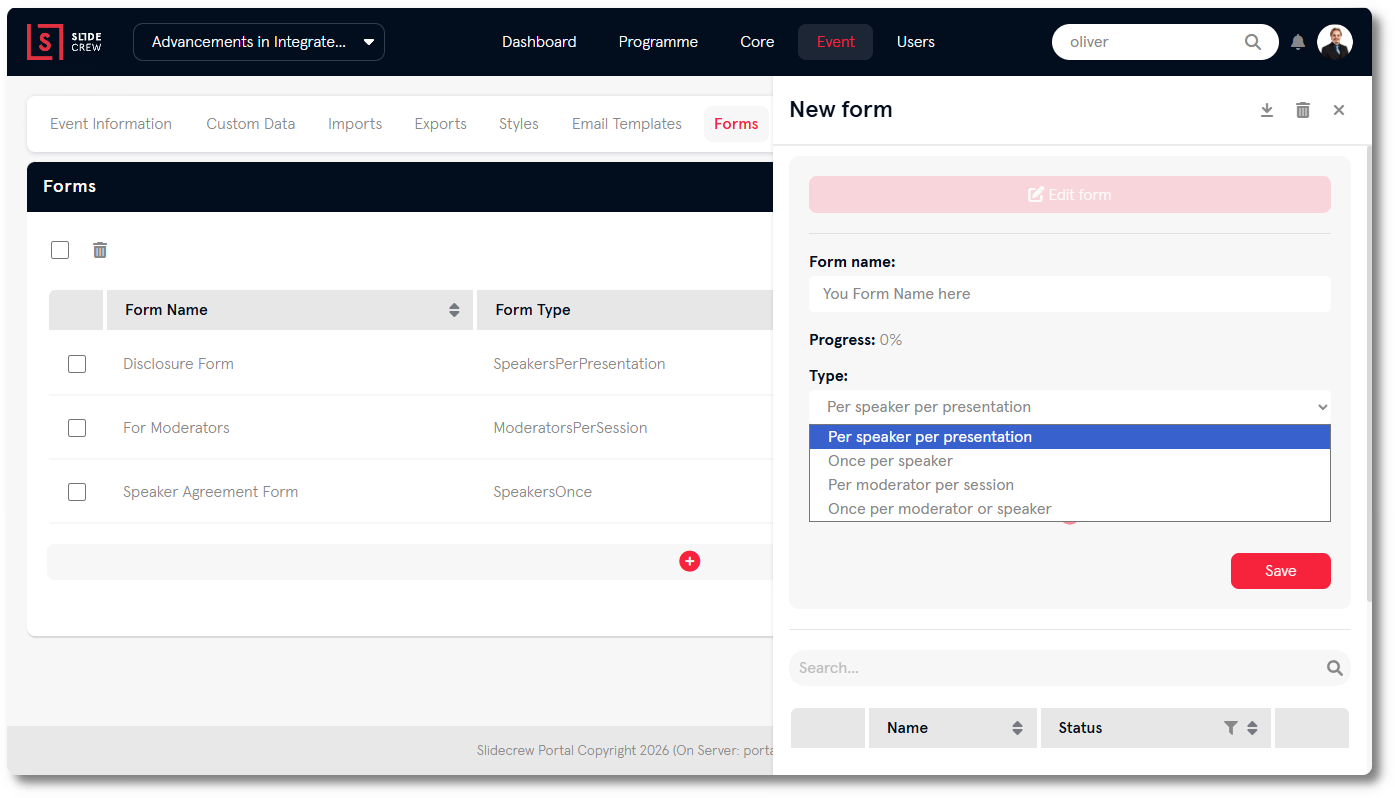
- Enter a Form name and select a Type.
- Click Save.
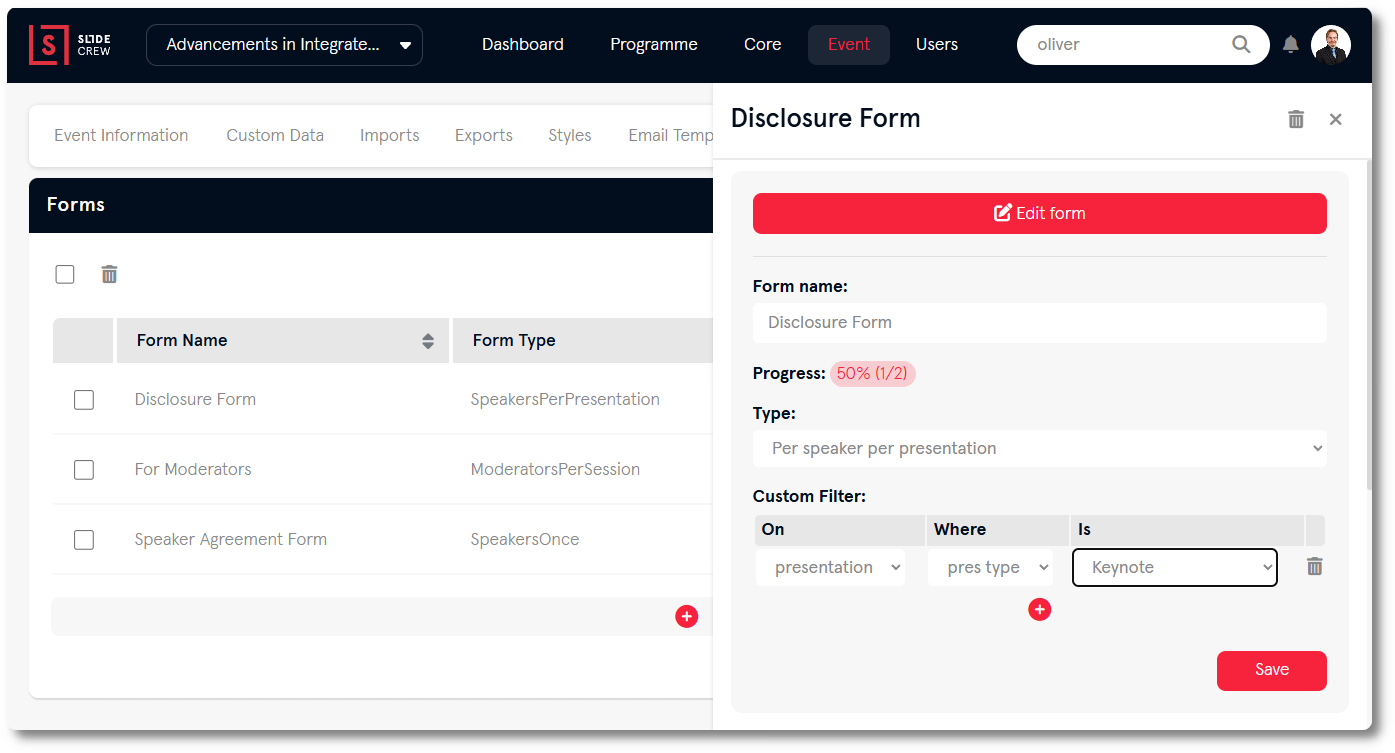
After you save the form, Edit Form and the Custom Filter table become active.
Choose who receives the form
The form type determines whether each person receives it once or once for each presentation or session.
| Type | Who receives it and when |
|---|---|
| Per speaker per presentation | Each speaker sees the form once for each of their presentations |
| Once per speaker | Each speaker sees the form once, regardless of how many presentations they have |
| Per moderator per session | Each moderator sees the form once for each of their sessions |
| Once per moderator or speaker | Each person sees the form once |
ePoster Submitters are treated as Speakers for form assignment.
By default, the form goes to all attendees of the selected type. To narrow the audience, select the form, add a row in the Custom Filter table, set its On, Where, Condition and Value columns, then click Save.
Add content and response fields to the form
Open the form in the Forms list and click Edit Form.
In the Form Editor, drag blocks from the left panel into the editing area, then click Save.
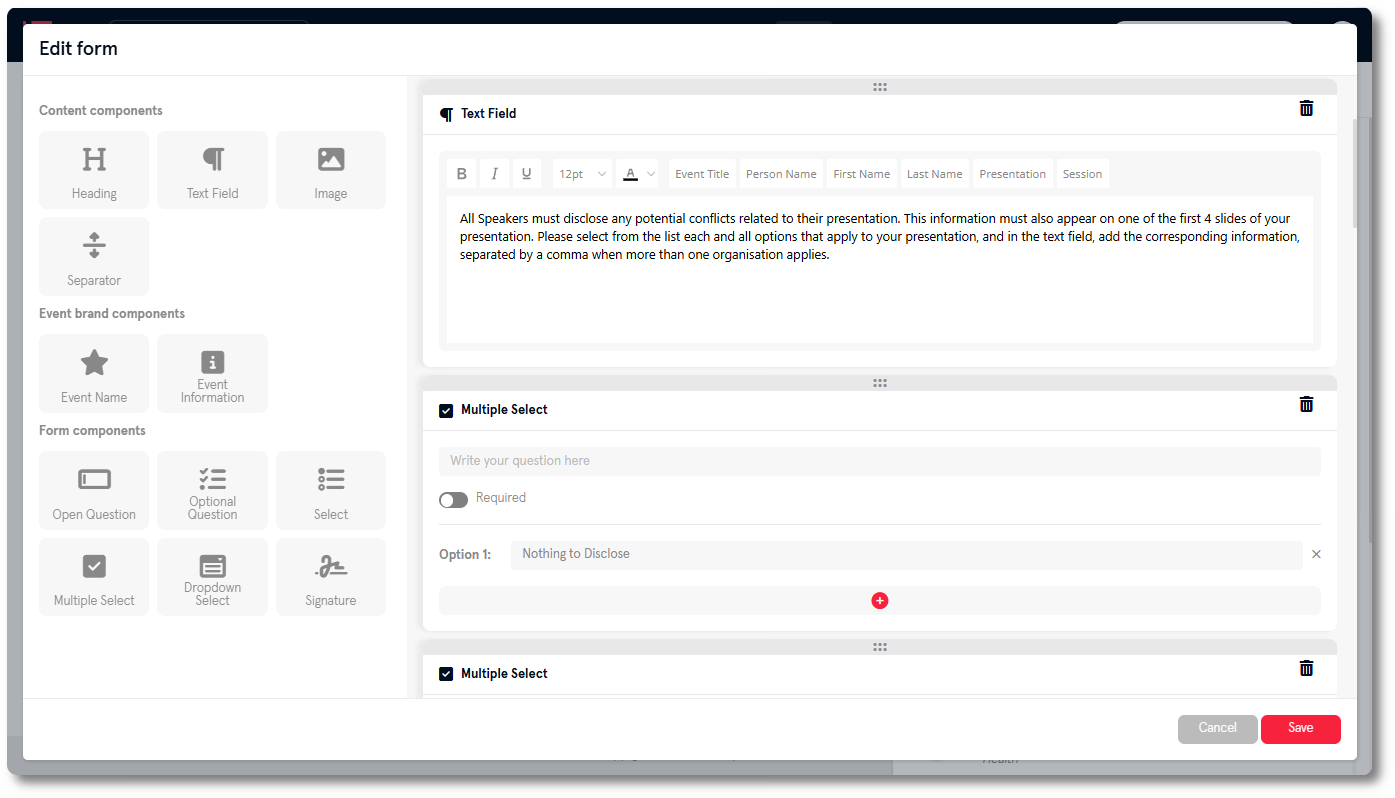
The blocks are grouped by what they add to the form:
Content components
| Block | What it does |
|---|---|
| Heading | A text heading. Set to either H1, H2 or H3 |
| Text Field | A rich text block supporting bold, underline, italics, and font size. Supports tags: {eventname}, {fullname}, {firstname}, {lastname}, {presentation}, and {session} |
| Image | An uploaded image. Adjust alignment and scale after inserting |
| Separator | A visual divider. Choose between a line, white space, or a page break |
Event brand components
| Block | What it does |
|---|---|
| Event Name | Displays the event’s full name as a heading. Set to H1, H2 or H3 |
| Event Information | Displays the event location, organising company, website, and start and end dates |
Form components
| Block | What it does |
|---|---|
| Open Question | A question with a free-text answer field. Required by default |
| Optional Question | Same as Open Question, but not a required field |
| Select | A single-select multiple-choice question |
| Multiple Select | A multiple-choice question where more than one answer can be selected |
| Dropdown Select | A single-choice question presented as a dropdown list |
| Signature | A field for the recipient to write their signature |
Review submissions and export form results
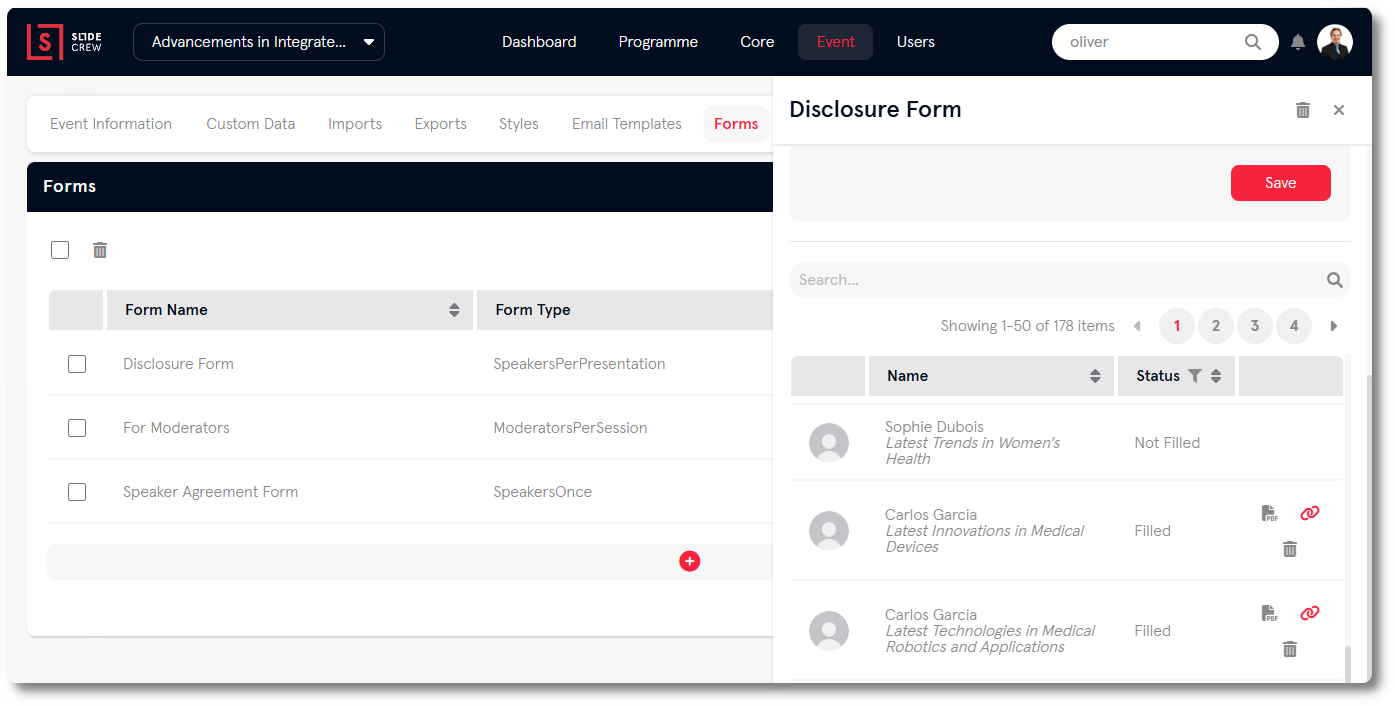
Select a form in the Forms list to open its sidebar. The submissions table has one row per submission, with buttons to download it as a PDF, open it in a new tab, or delete it.
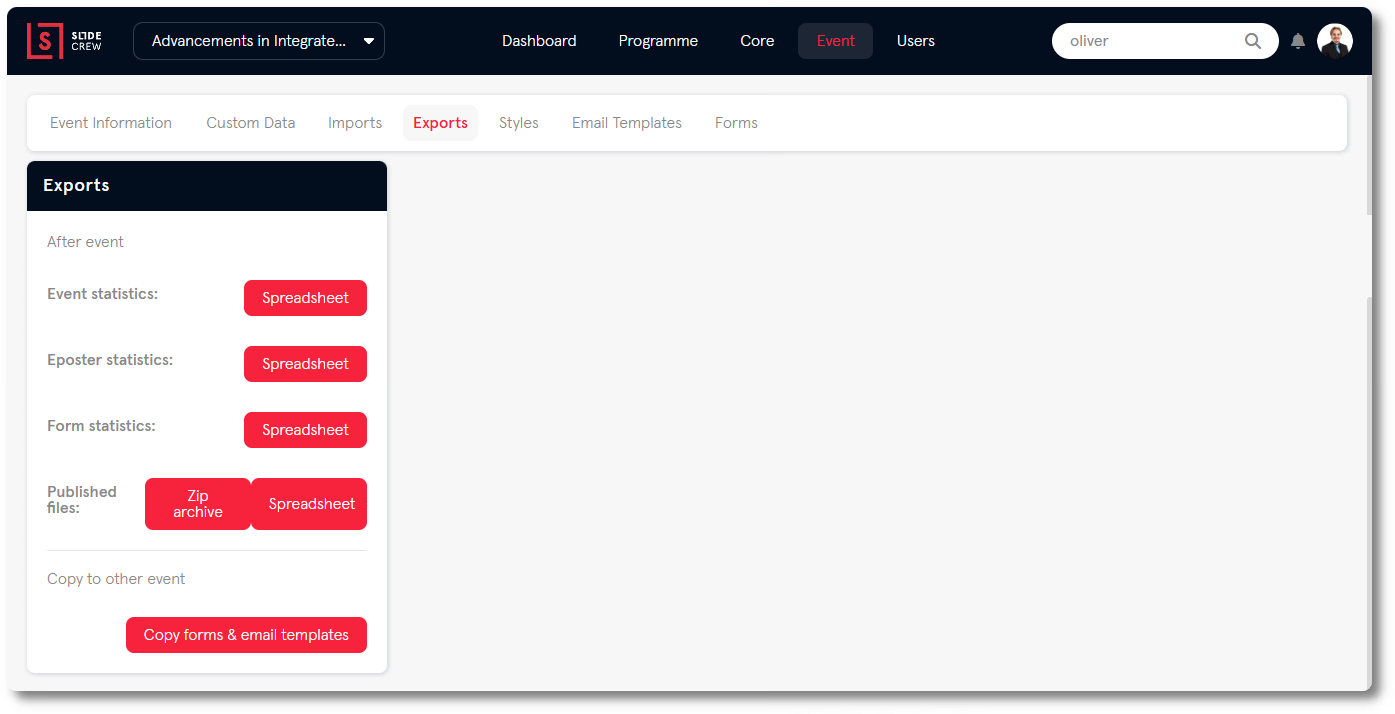
To export results, navigate to Event → Exports and click Spreadsheet under Form statistics. The downloaded spreadsheet has one sheet per form and one row per submission.
Copy forms to another event
An Admin or Organiser can copy forms and email templates to another event.
- Navigate to Event → Exports.
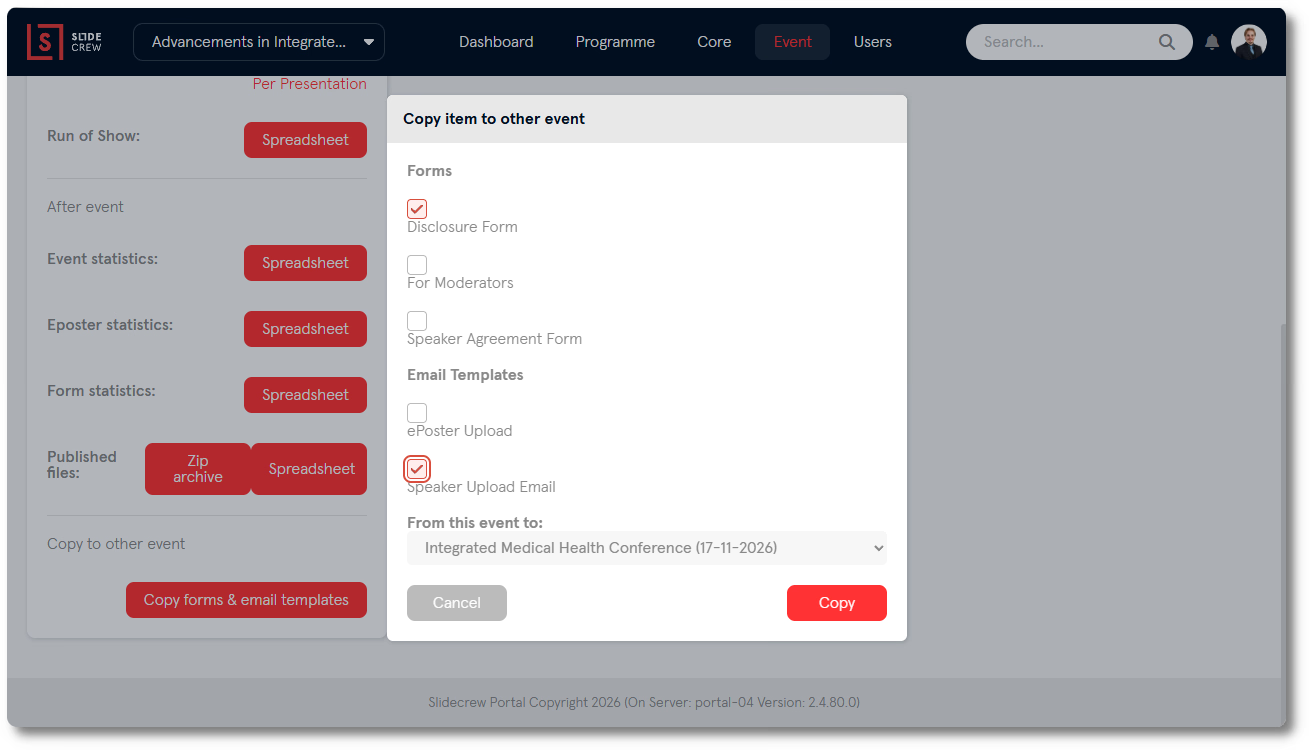
- Scroll to Copy to other event and click Copy forms & email templates.
- Select the forms or templates to copy and the destination event.
- Click Copy.
Related guides
- Creating and managing forms in Slidecrew → the full forms walkthrough
- What do speakers do before, during and after a Slidecrew event? → what speakers see when they complete a form
- How do I send email campaigns to speakers and moderators? → sending a campaign to speakers and moderators